There are many great movements out there teaching people how to code: Rails Girls and RailsBridge among the most prominent. Those movements host free workshops with a superb coach/student ratio to get more people into coding. However there is one problem: How to keep on coding? After the workshop the attendees are mostly on their own again, but we want them to continue! How can we do that? Here are methods we use in Berlin, that I hope can help other movements, subgroups and organizations to keep students engaged.
1. Project Groups
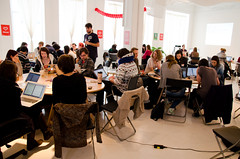
At Rails Girls Berlin we have project groups. These groups are usually formed after the workshop on the mailing list. Someone can suggest a project to work on or just join a project group. Project groups usually are supported by one or two coaches and have 4 to 8 students. Of course there are bigger and smaller groups. You then meet (usually) every week for a couple of hours to work on the project or talk about concepts. As once a week is not a lot there often is some kind of homework.
This concept has been very successful for us. I know of 8 project groups running right now, but I’m told there are ~12 of them which is amazing. Our first project group, the RubyMonsters, have been working as a group for roughly a year now. They already finished their first app and help coach at Rails Girls Berlin events now 🙂
I also heard of similar groups spontaneously forming in Poland after workshops, which made me really happy!
2. Advanced Workshops
At Rails Girls Berlin we often also let advanced applicants join the workshops (we have a workshop about every one to two months). Advanced meaning that they already visited a workshop or have other programming experience. They get their own groups and don’t follow the normal curriculum but rather work on something of their own (with the help of a coach).
We also sometimes host workshops solely for more advanced learners. I spent one such workshop with an experienced Java developer from Brazil talking about differences between the Rails and the Java world. It was a lot of fun!
3. User Groups
We try to encourage the attendees to attend user groups. Here it helps if they already know someone at the user group, e.g. a coach or an organizer. With us I organize the Ruby User Group Berlin and many coaches go there regularly too. Sadly we didn’t have too much success attracting learners to join us, but those that did, always told me that they liked it a lot 🙂
However there is something more suitable for learners: A user group for beginners! Our friends from Open Tech School have just the thing: The Learners Meetup. This happens once every month and there are learners and coaches present. The coaches may introduce themselves and the technologies they are familiar with. Then there is a talk about a basic programming topic suitable for beginners. After that there is a break and people can write down topics they are interested in on cards. Then the different topics are clustered and groups for discussions about those topics are formed. I really love this format and the event.
4. Informal Meetings
Project Groups are great, but they have a drawback: A couple of hours per week at a specific time isn’t really flexible and too much for some. Some also prefer to learn on their own, but how to get help when things aren’t going that well? Well that’s what informal meetings are for. Those are meetings where anyone might drop by and work on something or ask questions. You are mostly not guaranteed to have a coach around but learners can help other learners. And mostly you can check beforehand who is there and then see if someone may help with the problem you’re having. Open Tech School has the Learners Hangout every Saturday, which is a brilliant place to go. And in the future I want to try to establish a regular schedule where you can be certain that a coach is present.
5. Show them resources
During the workshop present some good resources to deepen the knowledge of whatever you taught in the workshop. That might be websites, books or user groups to go to. I think this is most fitting at the end of the workshop. Also make sure to publish that list online so attendees can refer back to it later and don’t have to write everything down. I have such a list on this blog myself.
This might be pointing out the obvious, but it’s important nonetheless.
6. A Summer of Code
You might have already heard of Rails Girls Summer of Code – it’s a worldwide program started in Berlin. The idea is to get more woman into coding – or rather further into coding when you continued after your workshop. It’s 3 months, full-time, paid, work on open source and students get supported by coaches and mentors. It’s an amazing program. And we’re still looking for some sponsors – so if you’re willing to help and want to allow us to accept more students please donate. And thanks a ton to all our sponsors so far!!!
7. Have former attendees coach at a workshop
When a former attendee of the workshop continued to code (which we hope!) then it is a brilliant opportunity to let them coach at a workshop. This works beautifully in three ways:
- Motivation for attendees: Attendees love to meet someone who has been down the same path before. When we had our lovely Ruby Monsters project group coach with us for the first time a record-breaking number of 3 project groups were founded afterwards. For me that’s the primary measure of success – the people we convince to keep on coding.
- Affirmation for former attendees/new coaches: They see all the things that they have learned, up to the point where they can help others learn which is an awesome feeling. Moreover teaching is the ultimate learning (a topic deserving of a blog post of its own…) – explaining something forces you to really understand something and often times leads to looking at things from a different angle which greatly benefits your own learning.
- Better coaching: Former attendees remember pretty well, what it was like as a beginner as this hasn’t been too long ago for them. Therefore their explanations often work very well.
See – everyone wins!
I at least know that in Poland they did the same, where former attendees are now coaches which is amazing. At Rails Girls Berlin when we did this for the first time we paired our new coaches up with an experienced coach in order to have a good mix of experience levels for coaching.
8. Share your learning story at the workshop
It is extremely cool to have someone at a workshop who taught themselves how to program. They can share all their insights and tips. Attendees can really relate to a talk like this as well as the person. You might also tell them, that sometimes learning to code is hard, sometimes it’s fun but in the end it’s worth it and a lot of fun. Tell them that it’s ok to make mistakes and that even the most experienced developers resort to search engines more often than you’d think.
Our Ruby Monsters often give a lightning talk about their story of learning in a project group at our workshops. And regularly Joan Wolkerstorfer also tells her story and gives tips. You can watch her talk about this and read about it.
When talking to attendees weeks after the workshop and asking them why they kept on coding meeting someone who has done it and hearing their story is almost always mentioned first.
A lightning talk is also an ideal time to introduce git or github, as these tools enable you to cooperate with others on your project! And we all know that working together with others, building something together, is a great motivation!
Conclusion
There are lots of ways to motivate workshops attendees to keep on learning. These are ways that worked for us or that I think work. Do you have other ideas how we can help people to keep on coding? Have you tried something? I would love to get some input! As a result of initial comments this blog post already grew from 6 to 8 ways 🙂


